LED surface-mounted spotlight Riti Astral B/G | Round | Black & copper-gold | GU10 | 230V | Indoor lighting

Wir beraten Sie gerne persönlich zu passenden Leuchten, Mengenstaffeln & Projektkonditionen.
Ideal für Elektriker, Bauherren und Renovierer.
General data:
- Color : Stylish black that exudes elegance.
- Application : Designed for indoor use, ideal for living rooms, bedrooms or work areas.
- Dimensions : A height of 110mm and a diameter of 85mm offer a compact but effective lighting option.
Technical data:
- Voltage : Operates with a rated voltage of 220-240 AC, suitable for standard household use.
- Maximum power : Supports bulbs up to a maximum power of 10W.
- Protection class : Class I protection against electric shock provides safety in use.
- Bulb type : Compatible with PAR16 bulbs and a GU10 socket, however the bulb is not included in the set.
- Material : Made from a sturdy aluminum alloy, known for both its durability and light weight.
Scope of delivery:
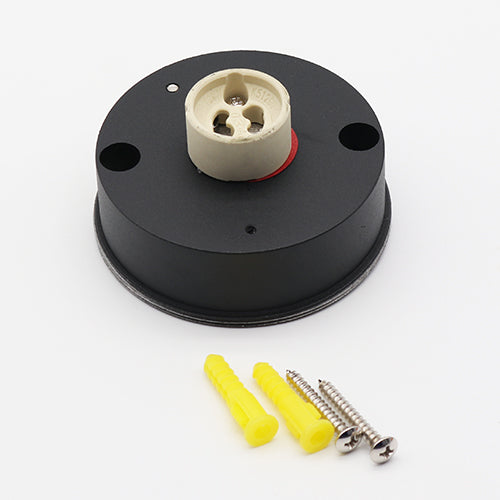
1x surface-mounted spotlight
1x mounting accessories
| GENERAL DATA: | |
|---|---|
| Color: | black |
| Installation location: | Ceiling mounting |
| Scope of application: | within |
| Min. installation distance to the illuminated object: | 0.5m |
| Height (mm): | 110 |
| Diameter [mm]: | 85 |
| TECHNICAL DATA: | |
| Nominal voltage [V]: | 220-240 AC |
| Nominal frequency [Hz]: | 50 |
| Maximum power [W]: | max10 |
| Protection class against electric shock: | I |
| Light sources: | PAR16 |
| Bulbs included in the set: | no |
| Base: | GU10 |
| Ambient temperature range [°C]: | 5÷25 |
| Housing material: | Aluminium alloy |
| Connection type: | Cube with screws |
| Cross-sectional area of the used Cables [mm²]: |
0.75÷1.5 |
| IP class (protection class): | 20 |
Assembly instructions Astral lamp
Step 1: Installing the mounting plate
Start by mounting the included mounting plate to the ceiling using the two screws provided. Please refer to the following image for a visual guide:

Step 2: Screwing the parts together
Both the mounting plate and the body of the lamp have matching threads. Screw these two parts together as shown in the following picture:

Step 3: Completing the assembly
Once you have successfully screwed the two parts together, the assembly is complete. The light will now be harmoniously attached to the ceiling.


