LED recessed spotlight Decoro | 6.2W | Warm white | Dimmable | rigid | Round | Matt brass | GU10 | 230V
Hole size: Ø 60mm
Can be connected directly to 230V
Can be connected directly to 230V
Schneller Versand
Geld-zurück-Garantie & Käuferschutz
Einfache Rückgabe – kostenlos ab 60 €
Fragen zu diesem Artikel oder Projekt?

Features:
- Stainless steel with a shiny brass look! A touch of luxury for your home.
- Soft atmosphere and perfect lighting thanks to the dimmable 6.2W lamp in warm white (2700k).
- Pure flexibility! The Decoro Starr can be swivelled and allows for targeted lighting in your rooms.
- Easy installation thanks to the included GU10 socket – attach the spotlight in no time.
- Innovative design – The Decoro Starr is not just a spotlight, but a statement for your ceiling!
Scope of delivery:
- 1x recessed spotlight Decoro Starr in brass
- 1x LED bulb 6.2W dimmable warm white (2700k)
- 1x GU10 230V ceramic socket
- 1x assembly instructions
| Technical data | |
|---|---|
| Color: | Brass Matt |
| Material: | stainless steel |
| Scope of application: | Inside |
| IP class (protection class): | IP20 |
| External dimensions: | Ø80mm |
| Hole size: | Ø60-70mm |
| Installation depth: | 70mm |
| Included sockets: | GU10 |
| Nominal voltage: | 230V |
| Included bulbs: | yes - LED 6.2W Dimmable Warm White (2700k) |
| Dimmable: | Yes |
| Installation location: | Ceiling installation |
| Swivelling: | no |
| Connection type: | free cable ends |
| Technical data lamps | |
| Rated capacity: | 6.2W |
| Comparative performance: | 50W Halogen |
| Light color: | warm white |
| Color temperature: | 2700k |
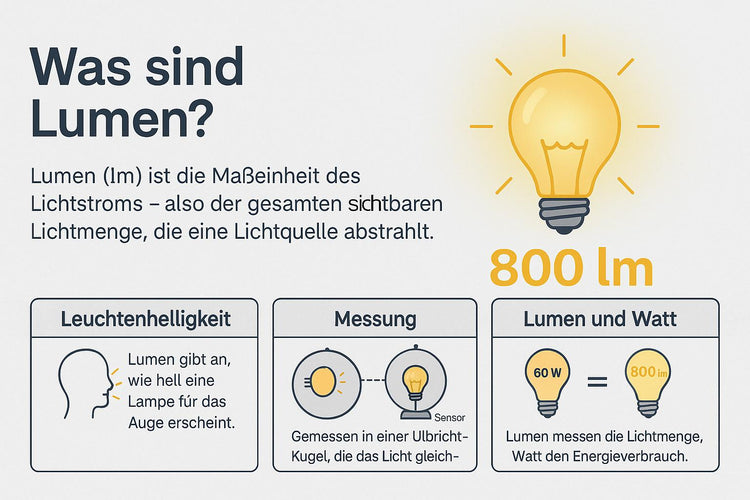
| Luminous flux: | 450lm |
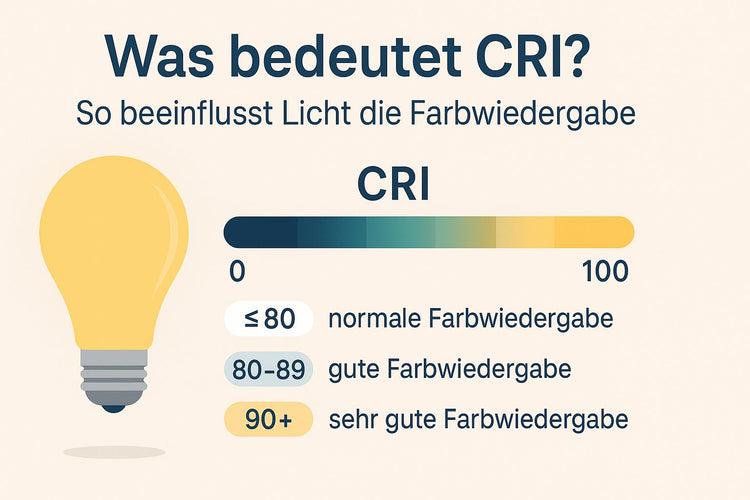
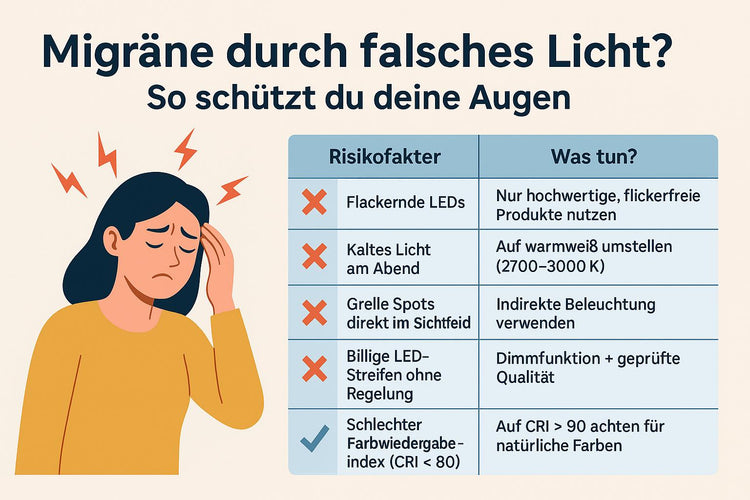
| Color rendering index: | ≥ 80Ra |
| Beam angle: | 36° |
| Lifespan: | 15000h |
| Switching cycles: | 20,000x |
| Start-up time in seconds: | < 0.5s |
Assembly instructions DECORO rigid
Step 1
Insert the included retaining springs into the recessed light (Image 1) if they are not mounted on the light housing. Please refer to the following image for visual instructions.

step 2
Fold up the two retaining springs and insert them into the drill holes as shown in Figure 2.

step 3
Press the recessed light into the hole with a little force and sensitivity. The retaining springs are pressed downwards and hold the recessed light in the ceiling.

Hinweis: Produktnamen sind Modellbezeichnungen; Hersteller oder Marke gelten nur als zugesichert, wenn diese ausdrücklich genannt werden.
Mehr Infos
Gewerbekunde? B2B-Zugang beantragen
Für Elektriker, Innenausbauer, Hausverwaltungen und gewerbliche Kunden bieten wir passende B2B-Konditionen.
B2B-Zugang beantragen